WORKING WITH DATA TABLES
Opening Data Files
MapInfo can open and work with standard database files (.DBF), Access Database files (.ACCDB), delimited ASCII files (.txt), and Excel spreadsheet files (.xls). MapInfo does NOT change the original file – it simply creates a TAB file that describes the structure of the data file. Note however that you cannot make changes to text and spreadsheet files (i.e. delete or create fields), BUT you can just make a copy of the file (a new MapInfo table) which can be edited (see tutorials).
Note that many data files contain column headings - you must often specify this when opening the file in MapInfo. It is also often necessary to specify the cell range that contains the data (NOTE: not all data files contain column headings - it is a good idea to take a look at a file in its original format (e.g. use a word processor to look at text files; use excel to look at .xls files, etc.) before you open the file in MapInfo).
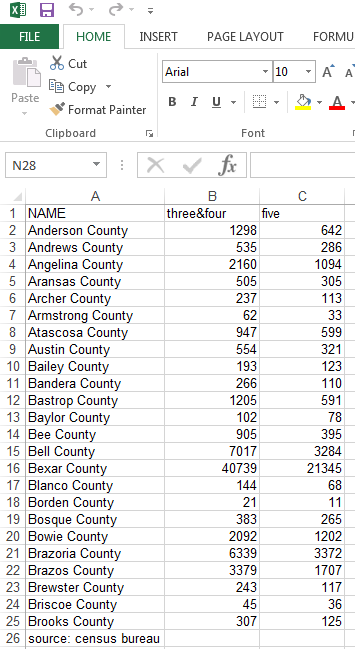
E.g. Open excel file AGE2.XLS in MapInfo.. Step 1, look at the file in excel..
Data range = A1..C26? No... the first row has column headings (sometimes the data you need starts on a row other than 1; in this case, it starts on row 2). Row 26 has a note on the source - this is not part of the data.
Select A2..C25 for the data range, row 1 = column headings. Then the first row of the excel table becomes the column headings in the MapInfo table, as shown below:

Internet Data Sources
The internet is a great source of data. One of the best examples is the U.S. Census Bureau. You can freely download files that can be used directly with MapInfo. (WWW.CENSUS.GOV). You can access 2000 through 2010 census data.
Joining Tables, calculating new columns
If you have two or more tables relating to the same places (e.g. counties), you can use SQL|Select to join them to form a single table if there is a matching column. E.g. (see below) Select all columns (*) from Tables: MALES90, FEMALES1990, where MALES90.NAME = FEMALES1990.COUNTY (columns NAME and COUNTY are matching columns - they contain the name of the county). The resulting joined table should be saved with a new name to make it permanent (NOTE: use "SAVE COPY AS" to save a joined table (do not use "save query as").

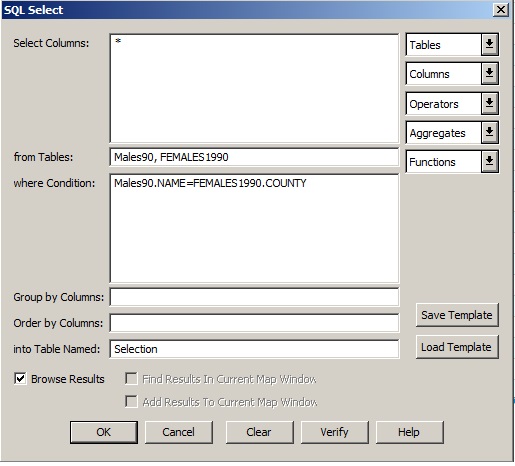
Example of using SQL to join 2 tables. Note that the "into Table Named" can be Selection (the default) - you then get a query table that you save with a new name (save-copy-as).
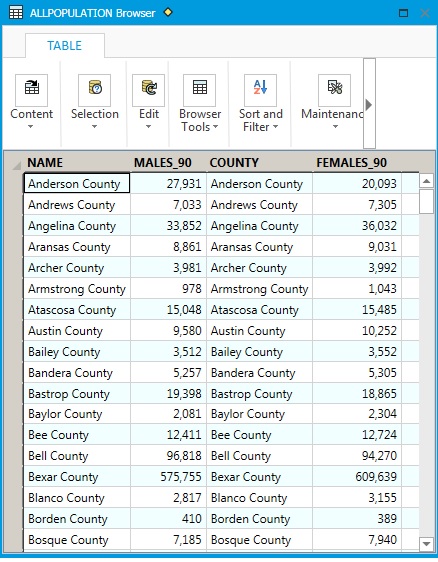
The
joined tables have been saved as "ALLPOPULATION". We want the total
population for each county; there are two steps to get this: 1. create
a new field to hold the total population data. 2. fill the new field
with total population values. Table|Table|Modify Structure|Add
Field can be used to add new fields to
tables.

A Total_Population field has been added to the table. Because it is a number, the data type "Float" has been selected. Note that field names cannot have spaces; they are usually replaced by "_".

The new field has been added, but does not yet contain data.
Table|Update column can be used to create expressions to fill new fields.
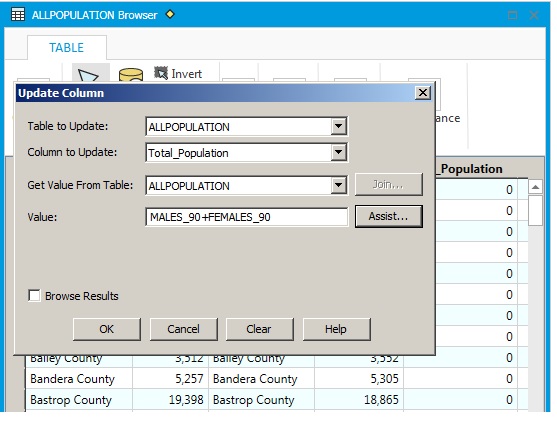
The
Update Column expression above will fill the total_population column
with values of MALES90 + FEMALES1990 (in other words the total
population).
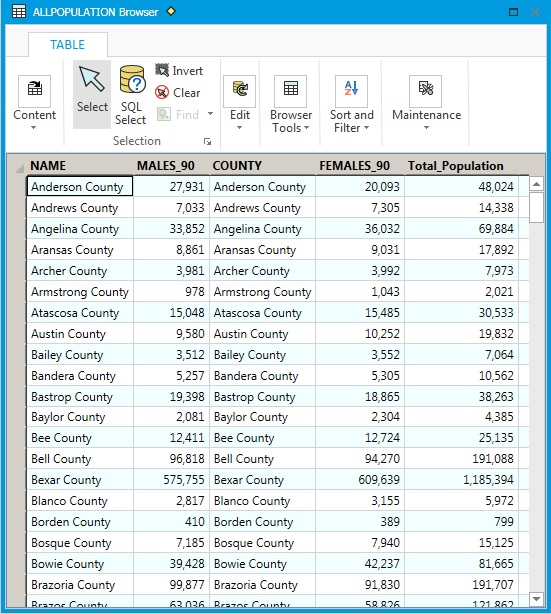
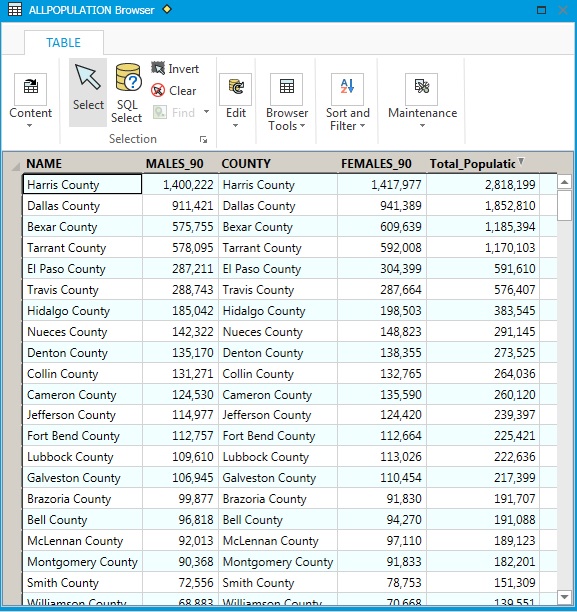
Here's the updated table. Tables can be SORTED by FIELD (just click on the field heading). For example, here's the ALLPOPULATION table sorted by Total_Population: